
Personalize Your VS Code AI with Custom Agents
How to create and manage Custom Agents in VS Code to make Copilot act like role-specific experts.
Feb 12, 2026
Introduction
Visual Studio Code has made AI even more powerful and personalized with Custom Agents, a way to tailor Copilot’s behavior for specific roles, tasks, or workflows. If you’ve ever wished Copilot could act like your own expert assistant for code planning, documentation, security reviews, or anything else, custom agents are your answer.
What Are Custom Agents?
Custom Agents let you define AI personas tailored to specific development jobs like a meticulous code reviewer, a strategic planning assistant, or a documentation specialist.
These aren’t generic helpers. They follow instructions you write, which means you control:
- How the AI thinks and behaves
- Which tools it can use
- Which language models it prefers
- How it structures its responses
In short, you’re shaping the AI to match your workflow.
How Custom Agents Work
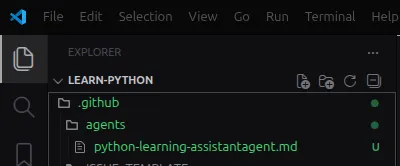
Custom agents are defined as Markdown files with a special extension: .agent.md.
Each file contains two main parts:
YAML Frontmatter
This includes metadata such as:
- The agent’s name
- A description
- Tools it can access
- Model preferences
Markdown Instructions
This is where you define the agent’s personality, role, and step-by-step behavior.
Here’s several practical examples you can drop into .agent.md files — pick one or combine them into a workflow:
---
name: CodeReviewer
description: Performs precise, actionable code reviews
tools: ["execute", "read", "agent", "edit", "search"]
model: ['GPT-5.2']
---
# Code review instructions
Act as a senior engineer. Review the provided diff or file, call out bugs, security issues, style problems, and suggest minimal, testable fixes. Always include code examples when recommending changes.
This structure makes it easy to define what the agent does and how it does it.

Where to Put Your Custom Agents
You can create custom agents in different locations depending on how you want to use them:
- Workspace level - ties the agent to a specific project
- User profile level - makes the agent available across all projects
VS Code automatically detects .agent.md files placed in the appropriate agents folder within your workspace.
Advanced Features
Custom agents become even more powerful when you use advanced features such as:
Agent Handoffs
Allow one agent to pass context to another for multi-step workflows.
Subagents
Break complex tasks into smaller, specialized agents.
Tool Control
Restrict agents to specific tools to optimize performance and behavior.
For example, you could create:
- A Researcher Agent that gathers information
- An Implementer Agent that writes code based on that research
This modular approach makes AI workflows more structured and scalable.
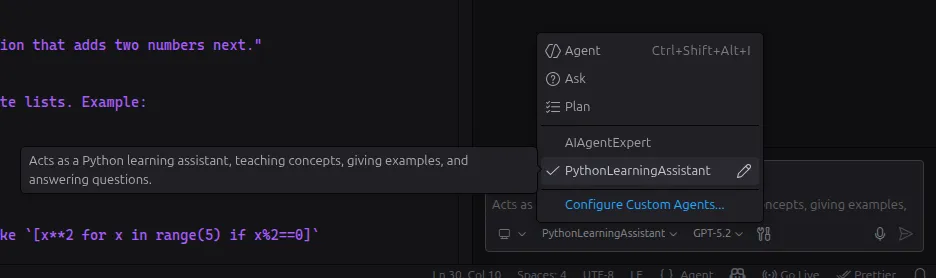
Managing Your Agents
If you create multiple agents, you can choose which ones appear in VS Code’s Agents dropdown. Show or hide agents to keep your workspace clean and focused.
Removing a Custom Agent
Removing an agent is simple:
- Delete the
.agent.mdfile - Or remove/hide it through VS Code’s interface
No complicated cleanup required.
Final Thoughts
Custom Agents transform VS Code Copilot from a general AI assistant into a role-specific expert built for your workflow.
Whether you’re:
- Planning features
- Reviewing code
- Writing documentation
- Designing systems
Custom agents let you design AI support that works exactly the way you need it to.